However, because Instagram filters lack the ability to customize exactly how the images will be altered, using these filters can actually lower the quality of your photographs.
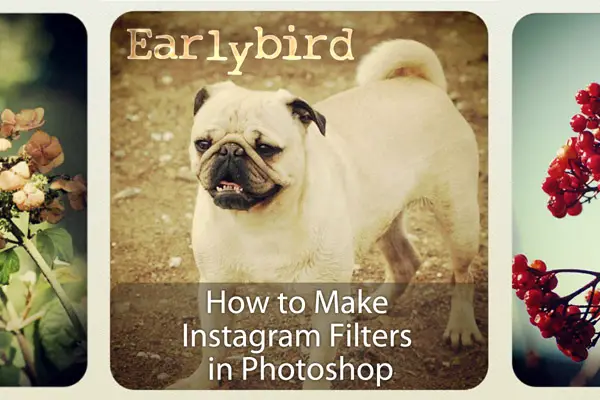
If you want to create photographs with high-quality post-editing, it is much better to use photo-editing software that has more customization features.
This guide will show you how to add really cool Instagram-inspired effects to your photos using Adobe Photoshop so that you can Instagram the professional way. You will also level up your Photoshop skills and pick up some tips and tricks along the way!
Prepare your workspace in Adobe Photoshop
Note: For this tutorial, I used Adobe Photoshop CS5 on Windows.Step 1: Open the image you want to edit in Adobe Photoshop. Unless you have an amazing computer, you might want to close all other programs except for this window. Photoshop tends to be unkind to older computers that don’t have gobs of RAM.
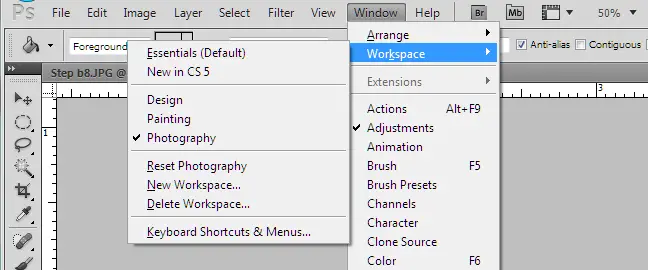
Step 2: Set up a Photography workspace by selecting Window > Workspace > Photography . This will open up all the windows you need for this tutorial.
Step 3: Select the Rectangular Marquee
Tool (or press M) and frame the area of the photo that you wish to be in
the final image. Go to Image > Crop. Hint: Do not crop out the
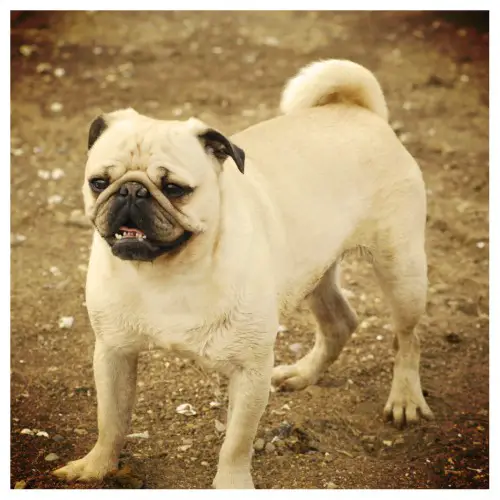
subject’s feet like I did when I took the picture.
Step 4: (Optional) The cropping tool on Instagram
forces all photos to have a 1:1 dimensional ratio, or more simply put,
to be square-shaped. Unless you want your photo to look exactly like an Instagram
photo, feel free to skip this step. Go to Image > Canvas Size or
press Alt+Ctrl+C. Change the number in the Height box so that it is
identical to the number in the Width box (i.e., give it a 1:1 ratio).
Click OK. Your image should now be square-shaped.Step 5: Go to File > Save As and save the file under a new name so that the original photo will not be affected.
The Earlybird Filter
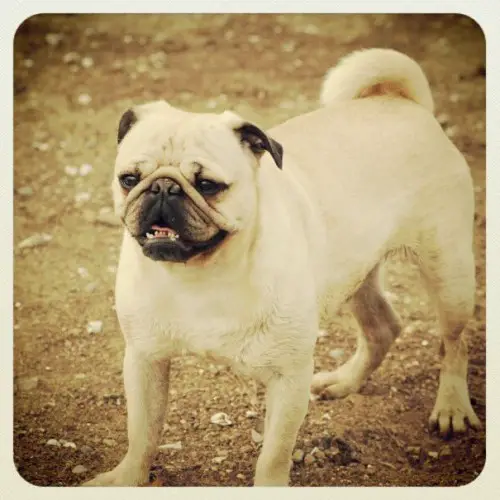
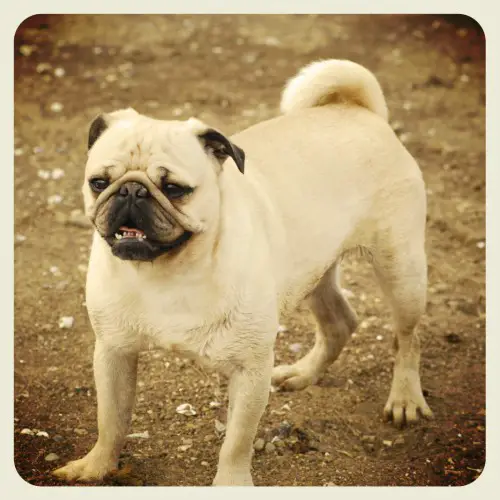
According to Webstagram, Earlybird is the most popular Instagram filter after Normal. The Earlybird filter adds sepia and yellow photo effects, as well as a soft blur and dramatic vignetting (darker edges and corners).
Achieve the Earlybird Filter Effect
Step 1: Right-click the background layer
and select “duplicate.” Name the new layer “Lighting Effects.” Now you
can alter the duplicate layer while keeping the original intact.
Step 2: With the “Lighting Effects” layer
selected, go to Filter > Render > Lighting Effects. Change the
Light Type to Omni. This will render an artificial lighting effect that
looks like a light bulb is located directly above the image. Drag the
circle so that the sides touch the edge of the photo. The light will be
brightest in the middle and grow dimmer toward the edges. Change the
Intensity to about 32 so that the center is a little overexposed and the
edges are a little darker. Click OK.
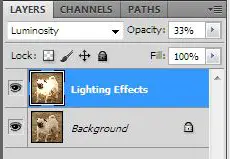
Step 3: Change the blending mode of the
“Lighting Effects” layer to Luminosity using the drop-down menu. The
Luminosity mode prevents the layer from affecting the colors of the
original image so that only the lightness values will change. Using the
slider, change the opacity so that the center of the photo is just
slightly over-exposed, and the corners of the photo are a bit dark. For
my image, the magic number was 33%.
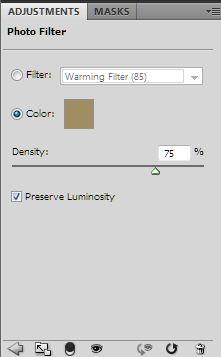
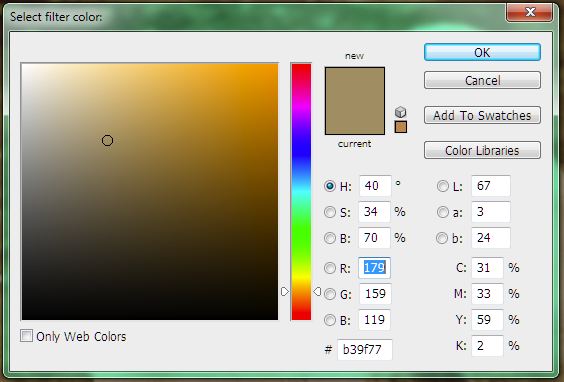
Step 4: Click Photo Filter in the
Adjustments menu. Click the circle next to Color, and then click on the
color box. In the box that has a # symbol next to it, type in the
following code: b39f77 . Change the Density to 75. This setting will add
some strong Sepia-like tones to the image.
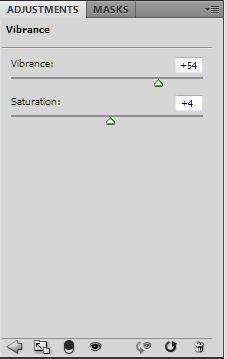
Step 5: Select Vibrance in the Adjustments
menu. Change the Vibrance to +54 and the Saturation to +4. Generously
increasing the Vibrance will make muted colors look more vivid, while
leaving already vivid colors and skin-tones unchanged. Slightly
increasing the saturation will make all colors in the image appear
slightly more vivid.
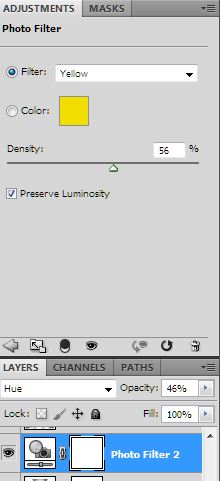
Step 6: Create another Photo Filter by
selecting Photo Filter in the Adjustments Menu. Choose Yellow in the
drop-down menu next to filter. Set the Density to 56%. Click on the
Photo Filter 2 layer in the Layers box. Change the Blending Mode to Hue
and the Opacity to around 50% so that the filter only affects the colors
and hue of the original image. The colors in the image should now have
a subtle yellow tint. If the colors look extremely yellow, lower the
opacity and density settings until you get the desired effect.
Step 7: Press Ctrl+Shift+N to create a new
layer. Name the Layer “Vignetting.” Right-click the Rectangular Marquee
Tool in the menu on the left and select Elliptical Marquee Tool. Press M
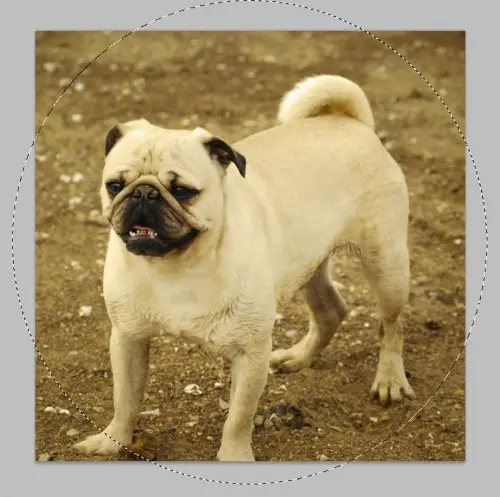
to use this tool. Align your cursor just outside the upper-left corner
of the photo. Click and drag toward the bottom-right corner until the
edges of the circle are just outside the edges of the image.
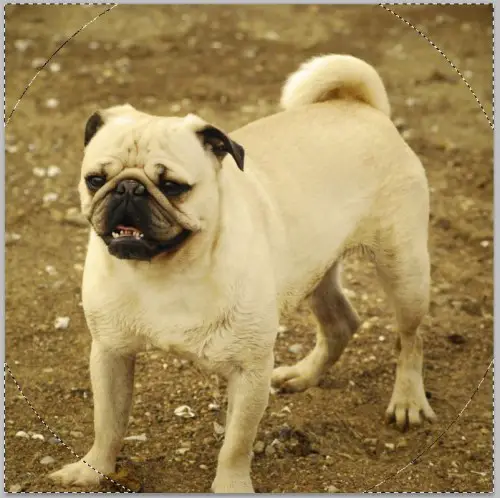
Step 8: Press Ctrl+Shift+I or go to Select
> Inverse to select the opposite of what you selected before. Only
the corners of the image should now be selected.
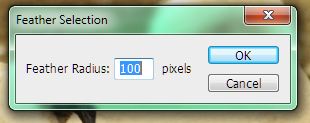
Step 9: Press Shift+F6 or go to Select
> Modify > Feather. Type 100 in the box and click OK. This will
greatly soften the selection. You may need to adjust this value
according to the size of your photo (i.e. use a larger number for a
larger photo).
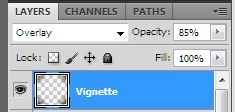
Step 10: With black set as the Foreground
color, press G to open the Paint Bucket Tool and click inside one of the
corners of the selection to fill it with black. Change the opacity of
the “Vignetting” layer to around 85% and change the blending mode to
Overlay. The Overlay blending mode will lighten the lighter parts of the
image and darken the darker parts. Press Ctrl+D to deselect the image.
The edges of the image, especially the corners, should look much darker
and more dramatic.
Step 11 (Optional): This step will show
you how to achieve the Earlybird blur effect; however, it is optional
since it does lower the quality of the photo a little (I prefer images
without blur, so I did not include the blur effect in my final image).
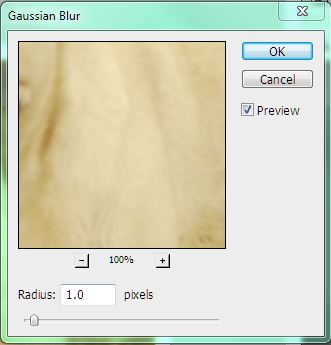
Save the image as a jpeg and include “blurred” in the file name. Open
the jpeg in photoshop. Go to Filter > Blur > Gaussian Blur. A
Guassian Blur will reduce noise as well as detail. Move the slider so
that the blur is barely noticeable and the Radius value reads 1.0.
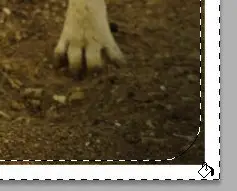
Create Earlybird Border (Optional)Step 1: Right-click the Rectangle Tool on the menu on the left. Select the Rounded Rectangle Tool. At the top, change the Radius to .2 in, and select the third icon from that left that says “Paths” when you hover over it. We will use the paths tool to turn the rounded rectangle into a selection rather than a filled shape.
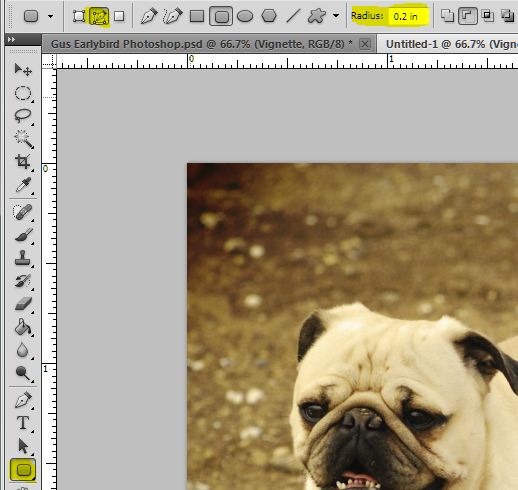
Step 2: Starting just inside the upper-left corner of the photo, click and drag toward the bottom-right corner so that the edges of the rounded rectangle shape touch the edges of the photo.
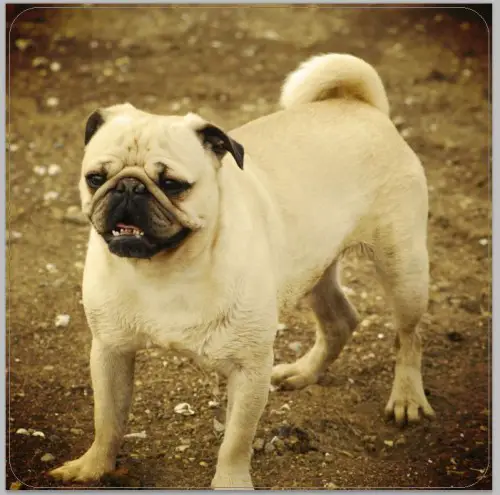
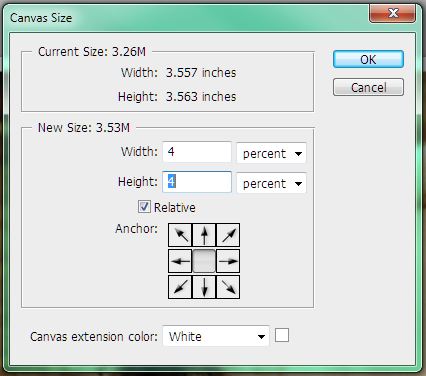
Step 3: Press Alt+Ctrl+C or go to Image
> Canvas Size. Check the box next to Relative and change Width and
Height to 4 percent. This will expand the size of the image by 4% so
that the frame will cut off as little of the actual photograph as
possible. There should now a white border around the image.
Step 4: Press Ctrl+Shift+N to create a new
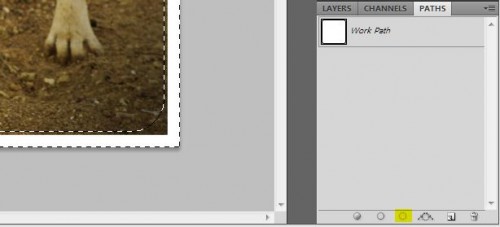
layer. Name the new layer “Border.” Click on the Paths Tab in the
Layers box. Click the icon that looks like a circle made of dashes and
says “Load path as selection” when you hover over it. This will turn the
rounded rectangle path into a selection instead. Press Control+Shift+I
to select everything opposite, or outside, the rounded rectangle
selection.
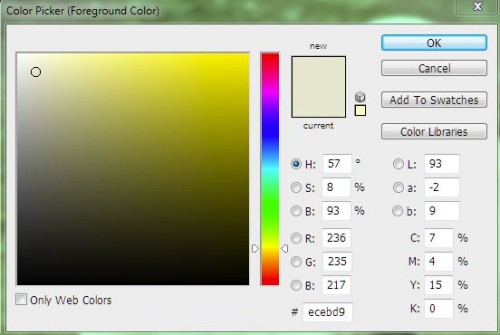
Step 5: Click inside the Foreground color
box to bring up the Color Picker menu. In the box next to the # symbol,
enter the following code: ecebd9 . This yellow-gray color matches the
color of the Instagram Earlybird border. Press OK. Using the Paint Bucket Tool, click inside the selection to fill the frame with this color.
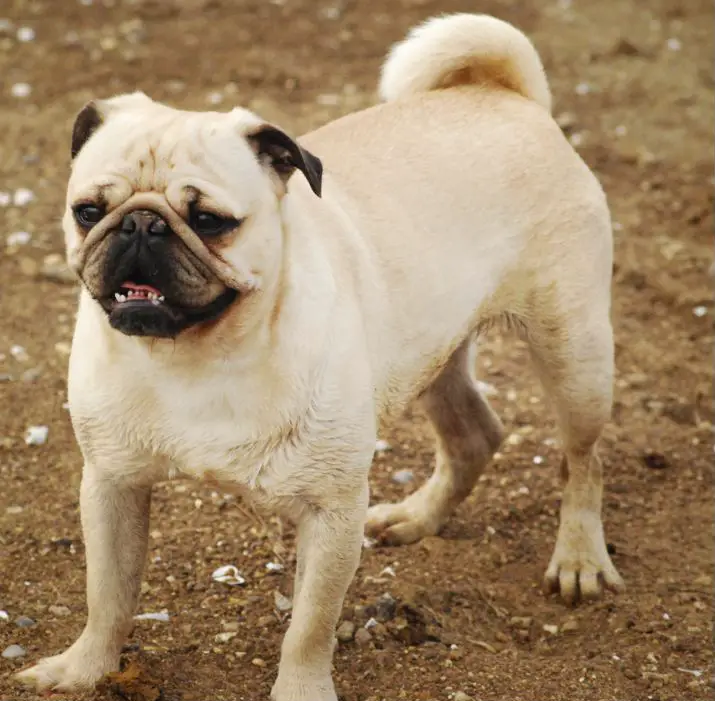
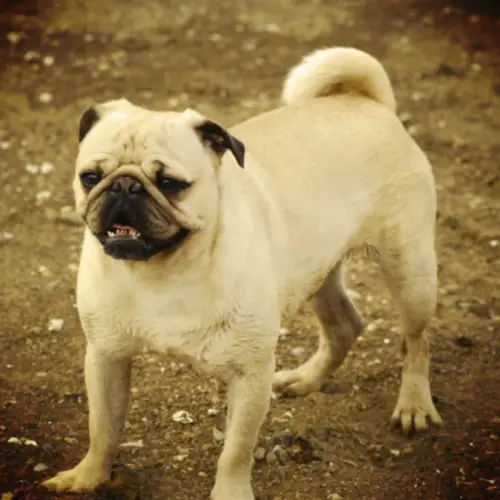
Congratulations! You’ve just finished creating a high quality version of Instagram’s most popular photo filter, Earlybird. Feel like a pro yet? Check back soon for more Instagram filter tutorials!Here’s my finished, super-adorable product:


0 comments:
Post a Comment